Calypso Cardan Assembly


In the first step you'll need to get the 3D printed parts. They are available on Shapeways (a print on demand service): https://www.shapeways.com/shops/turbolino
Of course you can print them on your own 3D printer. In this case you can download the models from the shapeways website. You'll need to create an account first. Then you can select "download product" on the product page.
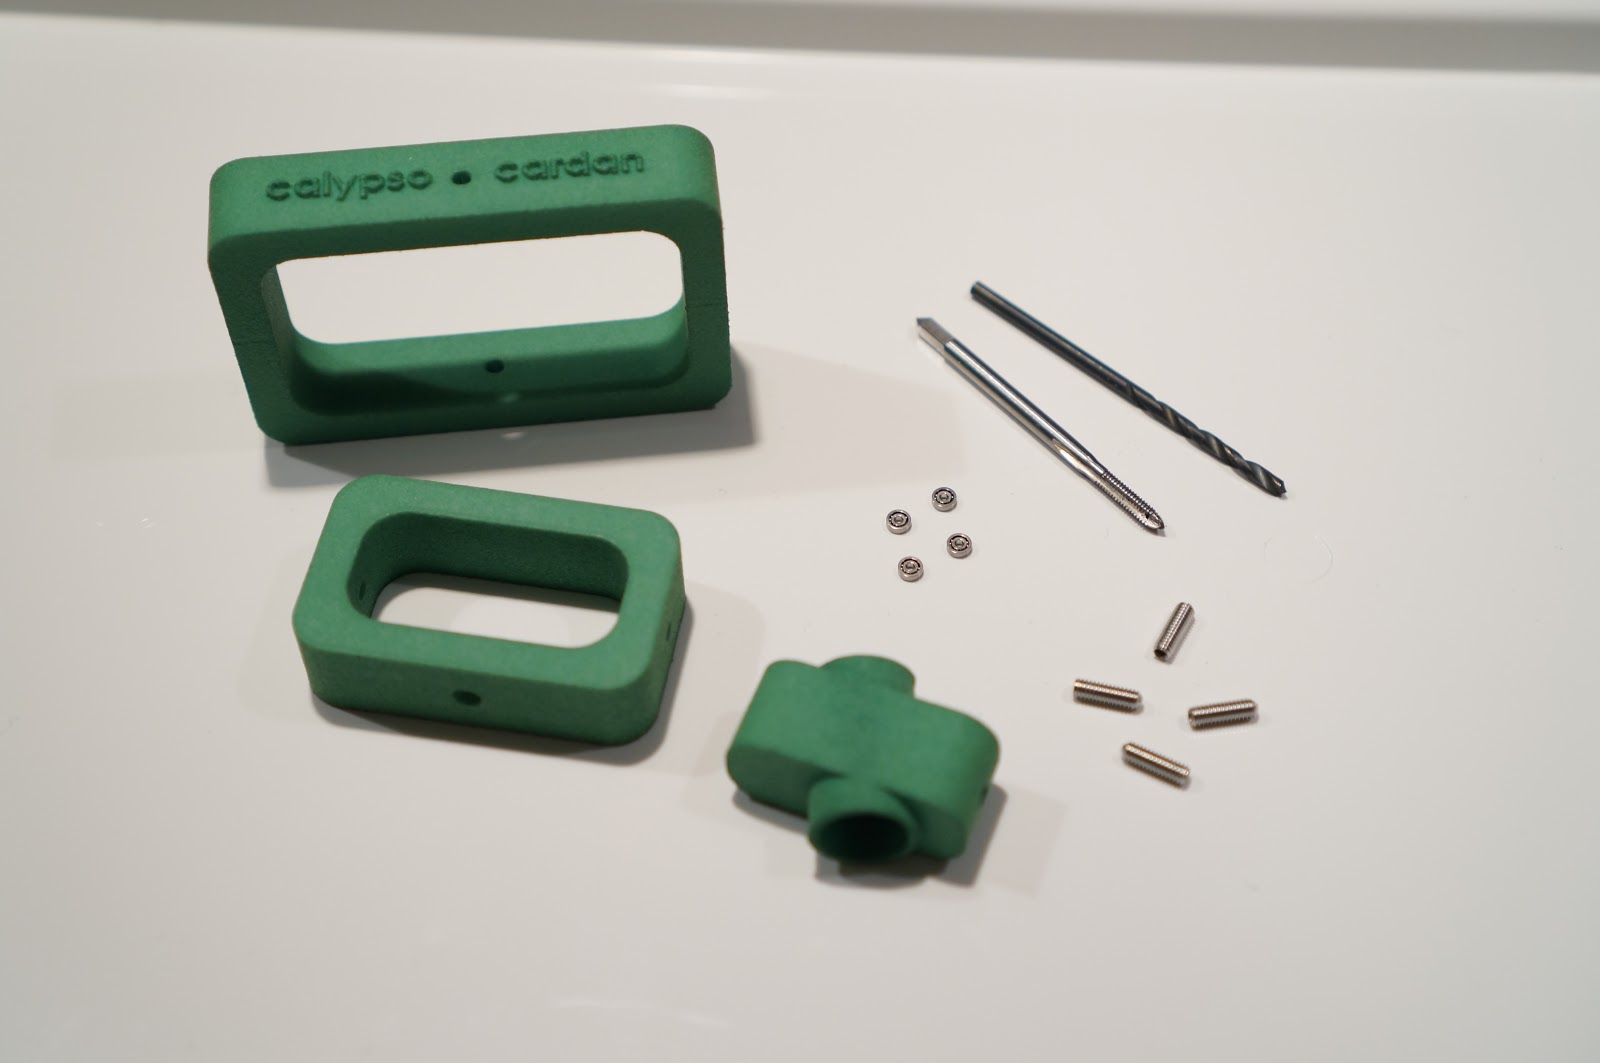
You'll need the following parts:
- calypso cardan inner part
- calypso cardan middle part
- calypso cardan outer part
- 4x set screws ISO4027 (DIN914) M2,5x10
- 4x miniature ball bearing 1x3x1mm
- optional: 4x checknut M2,5 flat type ISO 4035 (DIN 439B)
- screw tap M2,5 and a tap wrench
- drill 2mm
- hexnut wrench size 1.3
First cut the M2,5 threads to the through holes in the middle and outer part. The holes in the 3D printed parts are normally so accurate in size that you can cut directly without drilling up to 2mm.

Next, insert the miniature ball bearings. The easiest way will be putting the bearing on the table and then pushing the part to the bearing.

Don't "clamp" the bearings. They're not intended to deal with axial forces. Fix them first and then reduce the backlash to the minimum.
Do the same with the outer part but be careful that the inner part is assenbled in the correct way when the "CALYPSO CARDAN" lettering on the outer part is on the upper side.

When you insert a tube to the inner part, fix it between fingers or disassemble it first. Avoid applying excessive forces to the bearings and set screws.


great!
ReplyDeletewhat is the material you are printing with? I see that there is very nice structure on its surface.
ReplyDeleteThank you Tomasz! The material is called "versatile plastic" and the parts were printed by Shapeways.com on professional 3D printers. I don't even own a printer. I just made the digital models and sent them to the printing service. It's cheaper than buying a printer.. They're using printing machines that are not affordable by an amateur maker. They can even print solid metal.
ReplyDeleteGreat stuff Dominik!
ReplyDeleteJust wondering where I can find the .stl files. I have a Shapeways account, but I don't see the option to download the files.
Cheers!
Russ